Even though we’re all carrying around phones with professional-quality cameras these days, not all of us know how to take professional-quality photos.
Learning how to take professional photos with your iPhone is good for more than just expressing yourself better. Great photos can help you get noticed on social media — both humans and social media algorithms appreciate interesting visual content.
Use these 18 iPhone photography tricks to elevate your game.
Bonus: Download our free, customizable social media calendar template to easily plan and schedule all your content in advance.
iPhone photography: Composition tips
Composition refers to how the visual elements are arranged in your photo. One step towards taking professional iPhone photos is learning a few tips to improve your composition skills.
1. Shift your perspective
When we start taking photos, it’s only natural that we take them from about the same position we see the word from. Unfortunately, this doesn’t make for the most exciting photos.
To step up your game, try taking photos from outside your regular sitting or standing position. You can do this by shooting your subject from high or low angles.

Low-angle shots are a great way to put an interesting spin on iPhone product photography. They work well whenever you have a single subject that’s too big to fit in the frame when you get up close.
2. Look for detail in close-up shots
Good photography is all about showing people the world in a novel way. Shooting close up can make everyday objects look unexpected.

Look for interesting colors, textures, or patterns in your subject that might go unnoticed from far away.
3. Turn on grid to follow the rule of thirds
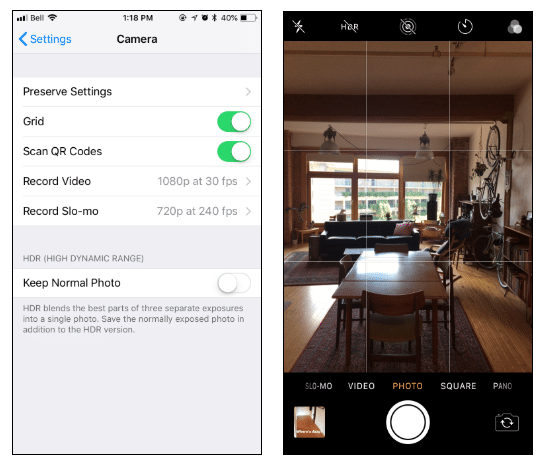
One simple iPhone photography trick is called the rule of thirds. This rule divides the field of your image into a three-by-three grid.
Placing your photo’s main subjects along these lines creates more visually compelling images.

Activate the grid lines by going to the Camera section of your iPhone’s settings and toggling the Grid switch to on.
4. Find leading lines
When you incorporate long, straight lines into your photo, you provide viewers with a roadmap to your image that helps them make sense of it. These lines are called leading lines because they lead the eye around the picture.

Leading lines can divide your photo into distinct parts, adding visual interest.
Leading lines that run from the edge of the field toward the center of focus give your photo a greater sense of depth.

5. Create a sense of depth
When we first learn to compose a shot, we usually only think about the frame in two dimensions. But our eyes love to be tricked into seeing depth in a flat object like a photo.
Take advantage of this by emphasizing depth in your composition. As we just saw, you can do that with leading lines, but that’s not the only way.
Placing a close-up subject against an out-of-focus background is a simple way to create a sense of depth.

You can also do the opposite. Try framing a photo’s main subject behind a slightly out-of-focus object in the foreground.
Try including distinct visual elements at different depths for a multi-leveled sense of depth. This technique works especially well in outdoor or landscape photography.

6. Play around with symmetry
Our brains like some symmetry, just not too much. To strike a balance, eye-catching compositions often have unequal elements on opposte sides of the frame.
This trick gives your photo a sense of organization without being too predictable.

Notice how leading lines connect the group of whiskey bottles to the single glass in the photo above. The two elements connect opposite parts of the frame and create visual contrast.
7. Keep it simple
If you’re taking iPhone photos for social media like Instagram, don’t forget that most people will see your work on small mobile screens.
A complex composition that looks great in a large print hanging on a wall can become busy and confusing on a mobile device.
Paring your compositions down to a few key elements makes them easier to understand on a small screen.
8. Pick the right orientation for your subject
In the same way that you wouldn’t use a cake recipe to bake a loaf of bread, the recipe for a great landscape photo isn’t the same as the one for an action shot.
The choice between portrait (a frame taller than it is wide) and landscape (a frame wider than it is tall) orientation may seem simple, but there are a few things to consider when making the decision.
As the name suggests, portrait orientation is the go-to format for iPhone portrait photography. It’s also usually appropriate anytime you’re shooting a single subject.

Portrait orientation is effective when you want to keep the viewer’s attention focused on the subject. Full-body and fashion photography are other situations where portrait orientation is usually the best choice.
Landscape orientation works best when shooting larger subjects, like landscapes. This orientation gives you more room to compose visual elements horizontally.

This orientation makes it easier for viewers to move their attention between equally important elements in the same photo.
When deciding between horizontal and vertical photos, you should also remember that different social media platforms and formats have different requirements. For example, vertical images work best for Instagram Stories, while horizontal photos look better on Twitter. (More on recommended social media image sizes in a bit.)
9. Use portrait mode for portraits
In iPhone photography, “portrait” can mean two things. One meaning is the frame’s orientation, which we discussed in the previous tip.
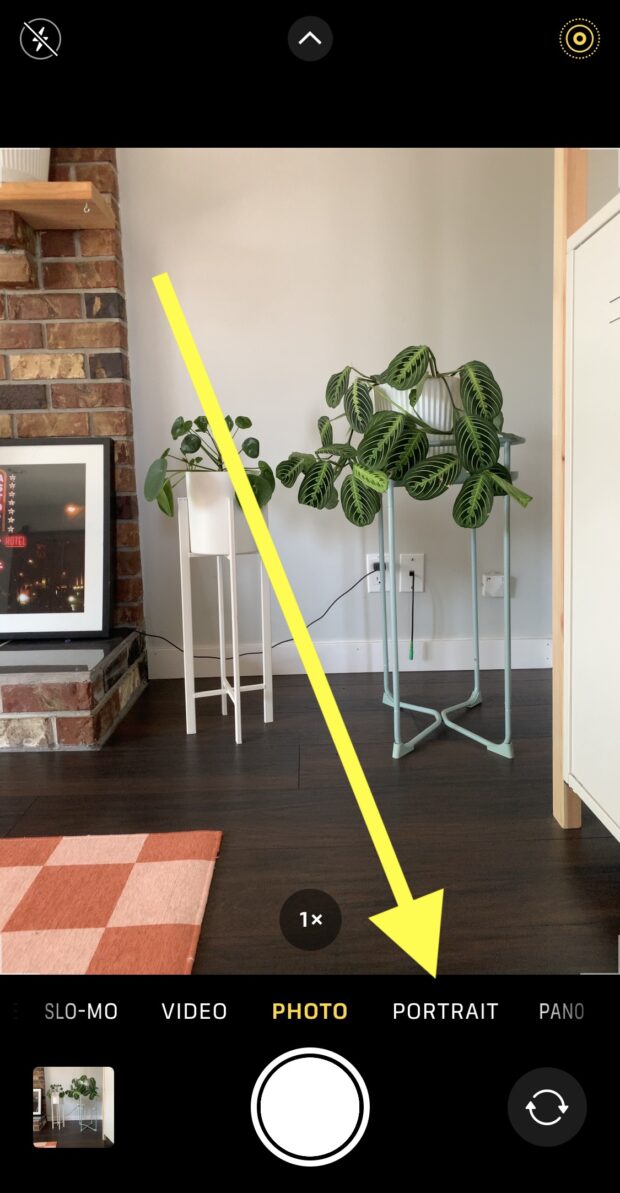
“Portrait” can also refer to one of the iPhone camera app’s settings. Selecting portrait mode will make your portraits more striking. You can find the setting just next to photo mode, above the shutter button.
This setting adds blur to the background so that the photo’s subject will stand out even more.

10. Stage your shot
Your choice of subject will determine which visual elements you have direct control over. This means that the best way to compose your photo depends on what you’re shooting.
If you’re shooting a small or moveable subject, don’t hesitate to move things around to get the best lighting and composition.
For larger subjects, don’t just shoot from the first place you find. Moving around the scene can change the composition of your photo even if all the elements are anchored in place.
iPhone photography: Technical tips
There’s more to great iPhone photography than composition. It also helps to have a little knowledge about some of the technical elements that turn a click of the shutter into an image.
11. Use the camera timer for steady shots
We’re lucky that we don’t have to hold still for fifteen minutes just to take a photo anymore, but a shaky camera can still turn a perfect shot into a blurry mess.
Unfortunately, using your thumb to tap the shutter button on your phone’s screen can make the camera shake at exactly the wrong moment. But there is a better way.
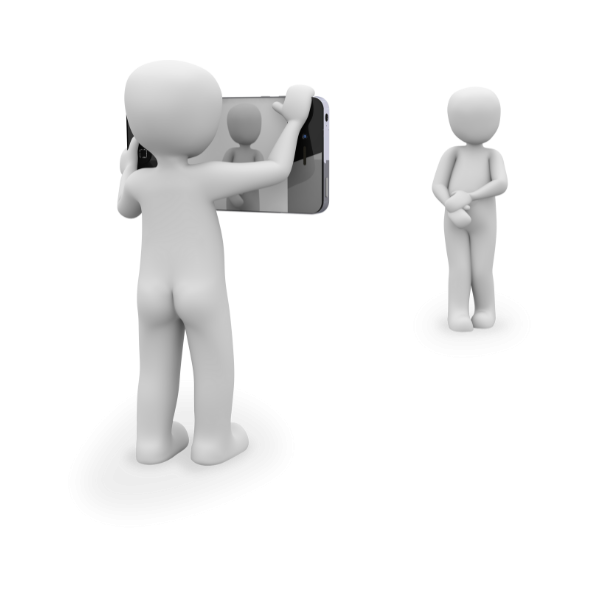
The camera timer isn’t just for no-hands selfies. You can use it for any shot to keep both hands on the camera when the shutter opens.
This method works best when taking pictures of stationary objects. There’s no guarantee the bird you see will still be on the same branch when the timer goes off.
You can also use the volume buttons on the side of your iPhone to take photos. This method isn’t quite as stable as the timer, but it does help you keep a steady hand when photographing more dynamic subjects.
12. Adjust focus and exposure settings
Your iPhone’s automatic camera settings make your life a lot easier, but sometimes you need to take matters into your own hands. Two settings that are easy to adjust yourself are exposure (how much light the camera lets in) and focus.
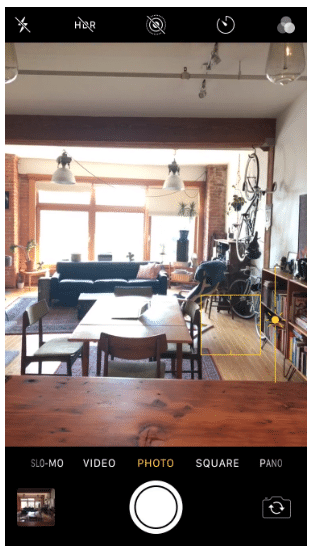
The iPhone will guess what the subject of your photo is and focus on it. Unfortunately, it doesn’t always guess right. To focus on something else, tap the screen where you want to focus to override your phone’s guess.
You can do the same thing for the exposure settings. Once you’ve tapped where you want to focus, swipe up or down to create a brighter or darker exposure.

The iPhone camera will default back to its automatic settings when it detects changes in the frame — usually either when you move or something in front of the camera moves.
To lock your current focus and exposure settings, tap the screen and hold your finger down for a few seconds. When AE/AF LOCK appears in a yellow box at the top of your screen, your settings are saved.

This feature is especially useful anytime you’re taking multiple shots of the same scene and don’t want to reset after every click. This includes iPhone product photography and portraits.
13. Avoid overexposure
Even if you’ve only taken a few photos before, you’ve probably noticed how important lighting is for a great picture.
In general, it’s better to err on the side of an image that’s a little too dark than a little too bright. Editing software can make a picture brighter, but it’s almost impossible to fix a photo that’s washed out by too much light.
That’s why it can be helpful to adjust how much light your iPhone camera lets in. To prevent overexposure, tap on the brightest part of the image to change the camera’s settings.
14. Use soft lighting
Quantity isn’t the only important factor in getting great lighting; quality matters too. Most subjects look best in soft light.
Soft light is produced when there’s something to blend the light as it travels from its source. Think of the difference between the harsh light from a bare lightbulb and the soft light from one covered by a lampshade.
When shooting inside, look for places where the light is diffuse. It’s also best to avoid placing your subject too close to any light sources.
If you’re shooting outside, try to avoid doing it during the middle of the day when the sun is directly overhead.
Wherever you’re taking photos, turn off your flash. Its light is as hard and unflattering as you can get.
15. Use HDR for photos with a wide range of light levels
HDR (high-dynamic-range) photos combine multiple shots taken simultaneously to produce a composite image.
Use HDR when your photos contain some very dark areas and some that are very bright. The HDR image will give you a level of detail that a standard photo couldn’t.
You can set HDR to be On, Off, or Automatic by tapping the HDR icon at the top of your screen in the iPhone camera app.
16. Know the recommended image sizes for different social media platforms
If your photo is going up on a social media platform, be sure it meets all the platform’s technical requirements.
Most social media platforms will crop or resize your photos if your files don’t have the right size or aspect ratio. Your photos will look better if you make the adjustments yourself rather than letting the algorithm do it for you.
17. Use iPhone photography apps for professional-quality touch-ups
Trends in iPhone photography for social media are favoring a less edited look. But this doesn’t mean there’s no place for photo editing these days.
Apps like TouchRetouch can clean up blemishes and dirt in your photos.
To adjust the lighting, both Afterlight and Adobe Lightroom offer various tools to get that perfect ambiance.
And though the natural look is in right now, reports of the filter’s death have been greatly exaggerated. Apps like VSCO have filters that do everything from subtle enhancement to stylized color saturation.
18. Use iPhone photography accessories
The most useful photography accessories for your iPhone are tripods, lenses, and lights.
Tripods range from small pocket-sized units to large standing models. Whatever the size, they keep your camera steadier than your hands do. This is particularly important for iPhone night photography and other low-light conditions.
An external lens can extend the functionality of your iPhone camera. Some lenses have optical zoom. This is much more flexible than the built-in digital zoom feature. Other lenses are specialized for either close-up or distant photography.
A portable light source can give you more control over your photographs’ lighting conditions. It also avoids the harsh lighting of the flash.
Schedule and publish your expertly edited social media photos directly from the Posts Baby dashboard. Save time, grow your audience, and measure your performance alongside all your other social channels. Try it free today.


